# Allive - 함께하는 세상 올리브
# Intro. 프로젝트 소개
올리브 프로젝트 소개 및 프론트 엔드 개발 회고 입니다 😁
프론트엔드 개발하면서 있었던 큰건 없고 사소하고 하찮은 고민에 대한 회고를 남겨두기 위함 입니다 ✍️
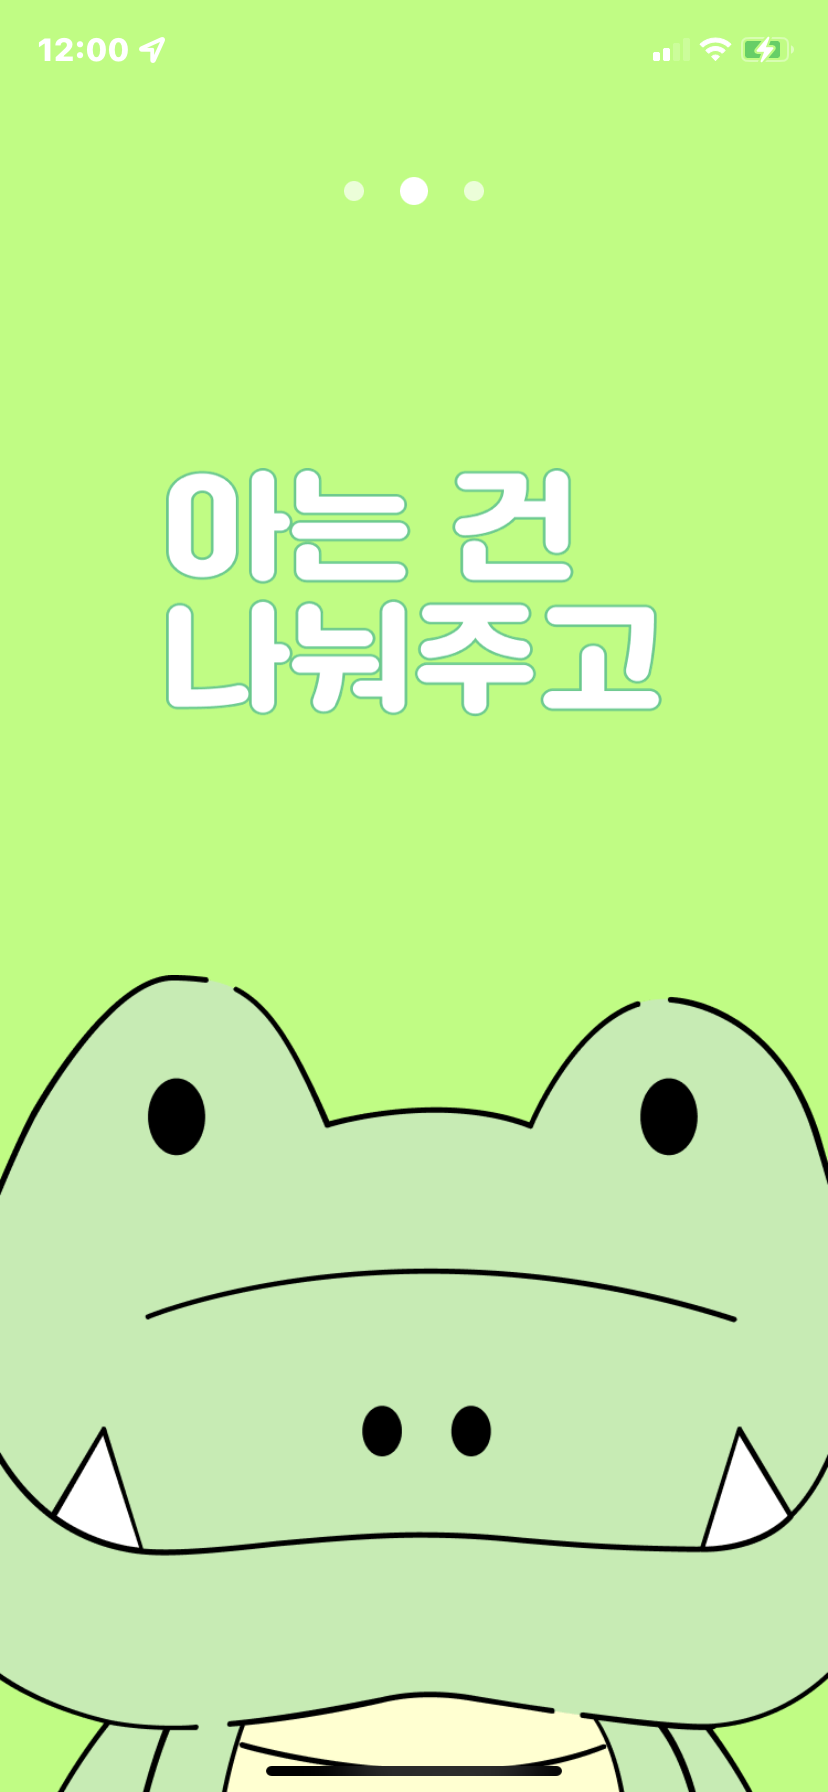
# 랜딩 페이지 : 올리브 랜딩 페이지 링크
TODO: 모바일 대응
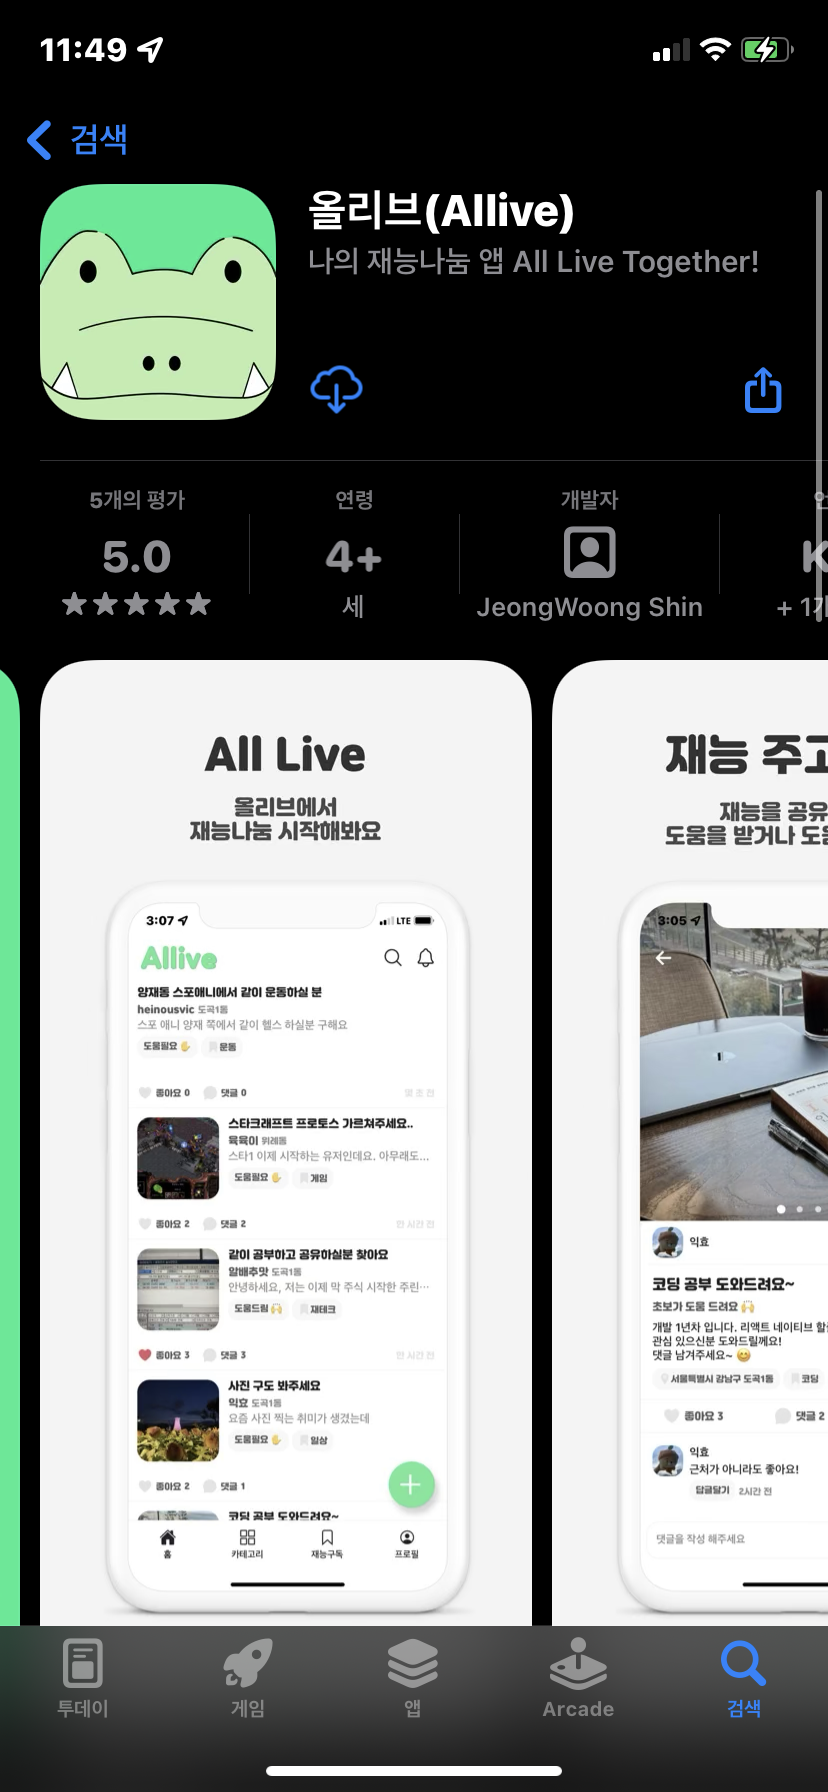
# 올리브는 어떤 프로젝트 인가요 🙋🏻
올리브 프로젝트 (Allive, All Live Together)는 2021년 3월부터 기획 및 기술 스택 스터디, 9월부터 본격적인 개발에 들어간 재능나눔 어플 프로젝트 입니다.
대학교 4학년 개발자 2명이서 학과 공부 및 회사 업무와 병행하며 퇴근 후, 주말 시간 등을 활용하여 열정을 불 태우며 개발중인 프로젝트 입니다. 🔥

개발자 소개 입니다.
# 프론트엔드 App 기술스택
React Native
Styled Components Native
Recoil js
Firebase (Cloud Messaging, Crashlytics, Analytics)
# 프론트엔드 Web 기술스택
- Next js -> 스택만 next 지 ssr 은 사용 못했음 (안했음)..
# 백엔드 기술스택
Java Spring
AWS - elasticsearch
Swagger
Serverless Graphql API
# 프로젝트 진행상황
| iOS | Android | Web | |
|---|---|---|---|
| 1차 배포 - 버전 1.0 | 배포 완료 ✅ | 배포 완료 ✅ | 배포 완료 ✅ |
| 2차 배포 - 버전 1.1 | 2021.12 예정 | 2021.12 예정 | 2021.12 예정 |
2차 배포를 마무리로 프로젝트 마무리 될 예정 입니다.
# Note 1. Serverless Graphql Chat API
채팅 구현을 앞두고 협업중인 백엔드 친구에게 채팅 서버를 개발 해보겠다고 하고 테스크를 맡았다.
스택은 여러가지 고민을 하다가 Appsync Aurora postgres lambda 로 구성을 하였고 cdk 코드 작성 후 배포 했다. 그냥 개발 단계부터 열정적으로다가 돈이 많이 든다.. 😵💫
appsync 는 amplify 등을 통해서 쉽게 스키마를 설계하고 자동으로 생성되는 resolver 를 사용할 수 있지만 커스터마이징이 어렵고 개발하면서 코드를 짜는 시간보다 aws vtl 등 문법을 찾아보거나 stack overflow 만 하루종일 뒤지는거보다 lambda 에 커스텀 resolver 를 사용해서 코딩하는 시간을 많이 쏟는게 더 좋았고 그렇게 시작해보았다.
개인적으로 aws 도큐가 너무 읽기 어렵다..
# Resolver 🏄♂️
아래는 람다 index.ts 코드 일부이다. 각각의 graphql query 에 resolver 함수를 매핑 해주었다. 여기까진 아주 순조로웠다.
exports.handler = async (event: AppSyncEvent, _: unknown, callback: (param: unknown) => void) => {
  try {
    const { token } = event.arguments;
    if (!token) throw new Error('TOKEN NOT FOUND');
    const { uid } = jwtDecode<{ uid?: string }>(token);
    if (!uid) throw new Error('USER NOT AUTHENTICATED');

    switch (event.info.fieldName) {
      case 'createMe':
        return await createMe(event.arguments.createMeInput, uid);
      case 'createMessage':
        return await createMessage(event.arguments.messageInput, uid);
      case 'createChatRoom':
        return await createChatRoom(event.arguments.chatroomInput, uid);
      case 'listChatRooms':
        return await listChatRooms(uid);
      case 'listMessages':
        return await listMessages(event.arguments.listMessageInput);
      case 'getChatRoom':
        return await getChatRoom(event.arguments.chatroomId, uid);
      case 'joinChatRoom':
        return await joinChatRoom(event.arguments.chatroomId, uid);
      case 'updateUserChatRoom':
        return await updateUserChatRoom(event.arguments.userChatRoomInput, uid);
      default:
        throw new Error('RESOLVER NOT FOUND');
    }
  } catch (error) {
    console.error(error);
    callback(error);
    return null;
  }
};
2
3
4
5
6
7
8
9
10
11
12
13
14
15
16
17
18
19
20
21
22
23
24
25
26
27
28
29
30
31
32
33
# Pagination ✂️
listMessages resolver 에서 pagination 을 어떻게 구현할지 고민이였다. 우선 custom lambda 로 시작한 이상 직접 구현해야 했다. 기존에 Rails Backend 개발할때
posts = posts.page(cursor)
와 같이 라이브러리에 의존해왔고 아무래도 백엔드 개발을 많이 안해본데다 쿼리를 LIMIT, OFFSET 등을 이용해서 구현하기도 애매했다.
sql 쿼리를 짜기 어려운거보다 page 별로 데이터 가져오다 도중에 상대가 메시지 보내서 추가되면 어떻게 처리해야하지?
pagination 이 밀림 없이 되나? 이런 고민들이 있는데 당장 모르겠어서 내게 익숙한 js 쪽에 로직을 더 집중하여서 코드를 구현 해봤다.
방법은 column id 값을 이용해서 가져온 데이터까지만 limit 으로 자르고 다음 페이지 정보와 함께 다음으로 처음 읽을 데이터의 id 값을 넘겨주는 식으로 구현했다.
async function listMessages(listMessageInput: ListMessagesInput) {
  const { chatroomId, limit, cursor } = listMessageInput;

  const { records } = await db.query(
    `
      SELECT *
      FROM messages
      INNER JOIN users
      ON users.useruid = messages.useruid
      WHERE messages.chatroomid = :chatroomId
      ORDER BY messages.createdat DESC
    `,
    {
      chatroomId,
    },
  );

  // 일단 chatroomId 기반으로 모든 메시지를 긁어 온다. 뭐 메시지 정말 많아봐야 몇백개쯤 될텐데
  // 우선 우리 서비스에는 큰 문제가 없으리라 생각 된다.
  // 이제 js 단에서 pagination 을 처리

  return paginate<Message>(records, {
    limit,
    cursor,
    column: 'messageid',
    map: mapMessage,
  });
}

// utils.ts

export interface PageInfo {
  nextCursor: string | null;
  hasNextPage: boolean;
  totalCount: number;
}

export interface PaginateResult<Output> {
  pageInfo: PageInfo;
  items: Output[];
}

const paginate = <Output>(records: AnyObject[], params: PaginateParams<Output>): PaginateResult<Output> => {
  const { limit, cursor, column, map } = params;

  let [startIdx, lastIdx] = [-1, -1];

  return records.reduce<PaginateResult<Output>>(
    (acc, curr, index) => {
      if ((!cursor && index === 0) || curr[column] === cursor) {
        [startIdx, lastIdx] = [index, index + limit];
      }

      if (startIdx <= index && index < lastIdx) {
        acc.items.push(map(curr));
      }

      if (index === lastIdx && records[lastIdx]) {
        acc.pageInfo.nextCursor = records[lastIdx][column];
        acc.pageInfo.hasNextPage = true;
      }

      return acc;
    },
    { pageInfo: { nextCursor: null, hasNextPage: false, totalCount: records.length }, items: [] },
  );
};
2
3
4
5
6
7
8
9
10
11
12
13
14
15
16
17
18
19
20
21
22
23
24
25
26
27
28
29
30
31
32
33
34
35
36
37
38
39
40
41
42
43
44
45
46
47
48
49
50
51
52
53
54
55
56
57
58
59
60
61
62
63
64
65
66
67
살짝 알고리즘 짜는 느낌이였지만 결과는 대성공 이였다.
아... 알고리즘 공부 언제하지 ㅠㅠ
# 최적화..?
cloud watch 로 확인 했을때 대부분의 api 요청이 30 ~ 60 ms 내에 처리 되었다. lambda 가 cold start 일때 평균 500ms 인걸 제외하면 생각한거보다 속도가 빨라서 아주 만족스러웠다.
문제는 createMessage 에서 처리해줘야 할게 많아서 평균 400 ~ 800 ms 응답 속도가 나왔는데
- userchatrooms unReadCnt 컬럼값 업데이트 (상대방 읽지 않은 수)
- fcm 처리
- chatroom lastMessage, lastMessagedAt 컬럼값 업데이트
를 해줘야 했다. 먼저 Promise.all 을 통한 병렬처리를 해줬지만 그래도 그나마 향상된게 300ms ~ 500ms 인데 결국 유저 입장에서는 이 또한 메시지가 바로가지 않기 때문에 답답함을 느낄 수 있다 생각 되었다. (일단 나는 답답했다).
async function createMessage(messageInput: CreateMessageInput, userUid: string) {
  // 생략
  const message = {
    messageId: messageId || uuid(),
    body,
    userUid,
    createdAt: now,
    chatroomId,
  };

  await Promise.all([
    db.query(
      'INSERT INTO messages (messageid,body,useruid,createdat,chatroomid) VALUES(:messageId,:body,:userUid,:createdAt,:chatroomId)',
      message,
    ),
    db.query(`UPDATE chatrooms SET lastmessage = :body, lastmessageat = :now WHERE chatroomid = :chatroomId`, {
      body,
      now,
      chatroomId,
    }),
    ...mapFcmPromises(chatroom, me, body),
    ...mapUpdateUserChatRoomPromises(chatroom, me),
  ]);

  return { ...message, writer: me };
}
2
3
4
5
6
7
8
9
10
11
12
13
14
15
16
17
18
19
20
21
22
23
24
25
26
결국 마지막 최후의 수단은 어차피 서버에서 문제 없이 메시지가 간다고 가정하고 프론트 단에서 처리를 해줘야겠다 생각을 바꿨다.
const messageSubmitHandler = useCallback(async ({ body }: MessageBarForm) => {
  try {
    const messageId = uuid.v4();

    const message: Message = {
      writer: {
        userId: `${currentUser.userId}`,
        userUid: currentUser.userUid,
        nickname: currentUser.nickname,
        deviceToken: null,
        profile: null,
      },
      body,
      messageId,
      chatroomId,
      createdAt: Date.now(),
    };
    // 우선 메시지가 문제없이 생기리라 가정하고 message list 에 추가
    queryClient.setQueryData<PaginateResult<Message> | undefined>(messagesQueryKey, (prev) =>
      prev
        ? {
            ...prev,
            items: [message, ...prev.items],
          }
        : prev,
    );
    // API 요청
    await ChatApi.Message.createMessage({ body, chatroomId, messageId });

    // 성공하면 createdAt 을 기반으로 다시 sorting 해줄 수 있지만 도중에 순서가 섞일 정도로 채팅이 활발할까
    // 싶기도 하고 100 ~ 200 ms 사이에 동시에 보내진 메시지가 잠깐 순서가 바뀌어 보여도 크게 사용자 경험을 해치진 않는다 생각한다.
  } catch (error) {
    console.error('error', error);
  }
}, []);
2
3
4
5
6
7
8
9
10
11
12
13
14
15
16
17
18
19
20
21
22
23
24
25
26
27
28
29
30
31
32
33
34
35
# Message UI 처리
개인적으로 이번 채팅서버 개발동안 제일 재밌었던 부분.
RN 에서 react-native-gifted-chat 이라는 라이브러리가 있긴 하지만 또 직접 구현하기로 마음 먹었다.
살짝 까다로웠던게 프로필은 올라가고 날짜는 동일하면 내려가고 등 앞, 뒤 메시지에 따른 뷰처리인데
const renderItem: ListRenderItem<Message> = useCallback(
  ({ item: currMessage, index }) => {
    const isMyMessage = Number(currMessage.writer.userId) === Number(myUserId);
    const nextMessage = messages[index + 1];
    const prevMessage = messages[index - 1];

    const prevYYYYMd = prevMessage ? format(prevMessage.createdAt * 1, TIME_FORMAT.YYYYMd) : '';
    const currYYYYMd = format(currMessage.createdAt * 1, TIME_FORMAT.YYYYMd);

    const prevHHmm = prevMessage ? format(prevMessage.createdAt * 1, TIME_FORMAT.HHmm) : '';
    const currHHmm = format(currMessage.createdAt * 1, TIME_FORMAT.HHmm);
    const isNextDiffUser = nextMessage ? nextMessage.writer.userId !== currMessage.writer.userId : true;
    const isPrevDiffUser = prevMessage ? prevMessage.writer.userId !== currMessage.writer.userId : true;

    return isMyMessage ? (
      <MyMessageBubble
        message={currMessage}
        currHHmm={currHHmm}
        currYYYYMd={currYYYYMd}
        isNextDiffUser={isPrevDiffUser}
        isHHmmDiff={currHHmm !== prevHHmm || isPrevDiffUser}
        isDiffDate={currYYYYMd !== prevYYYYMd && !!prevMessage}
      />
    ) : (
      <OtherMessageBubble
        message={currMessage}
        currHHmm={currHHmm}
        currYYYYMd={currYYYYMd}
        isNextDiffUser={isNextDiffUser}
        isHHmmDiff={currHHmm !== prevHHmm || isPrevDiffUser}
        isDiffDate={currYYYYMd !== prevYYYYMd && !!prevMessage}
      />
    );
  },
  [messages],
);
2
3
4
5
6
7
8
9
10
11
12
13
14
15
16
17
18
19
20
21
22
23
24
25
26
27
28
29
30
31
32
33
34
35
36
요런식으로 한번 해봤고
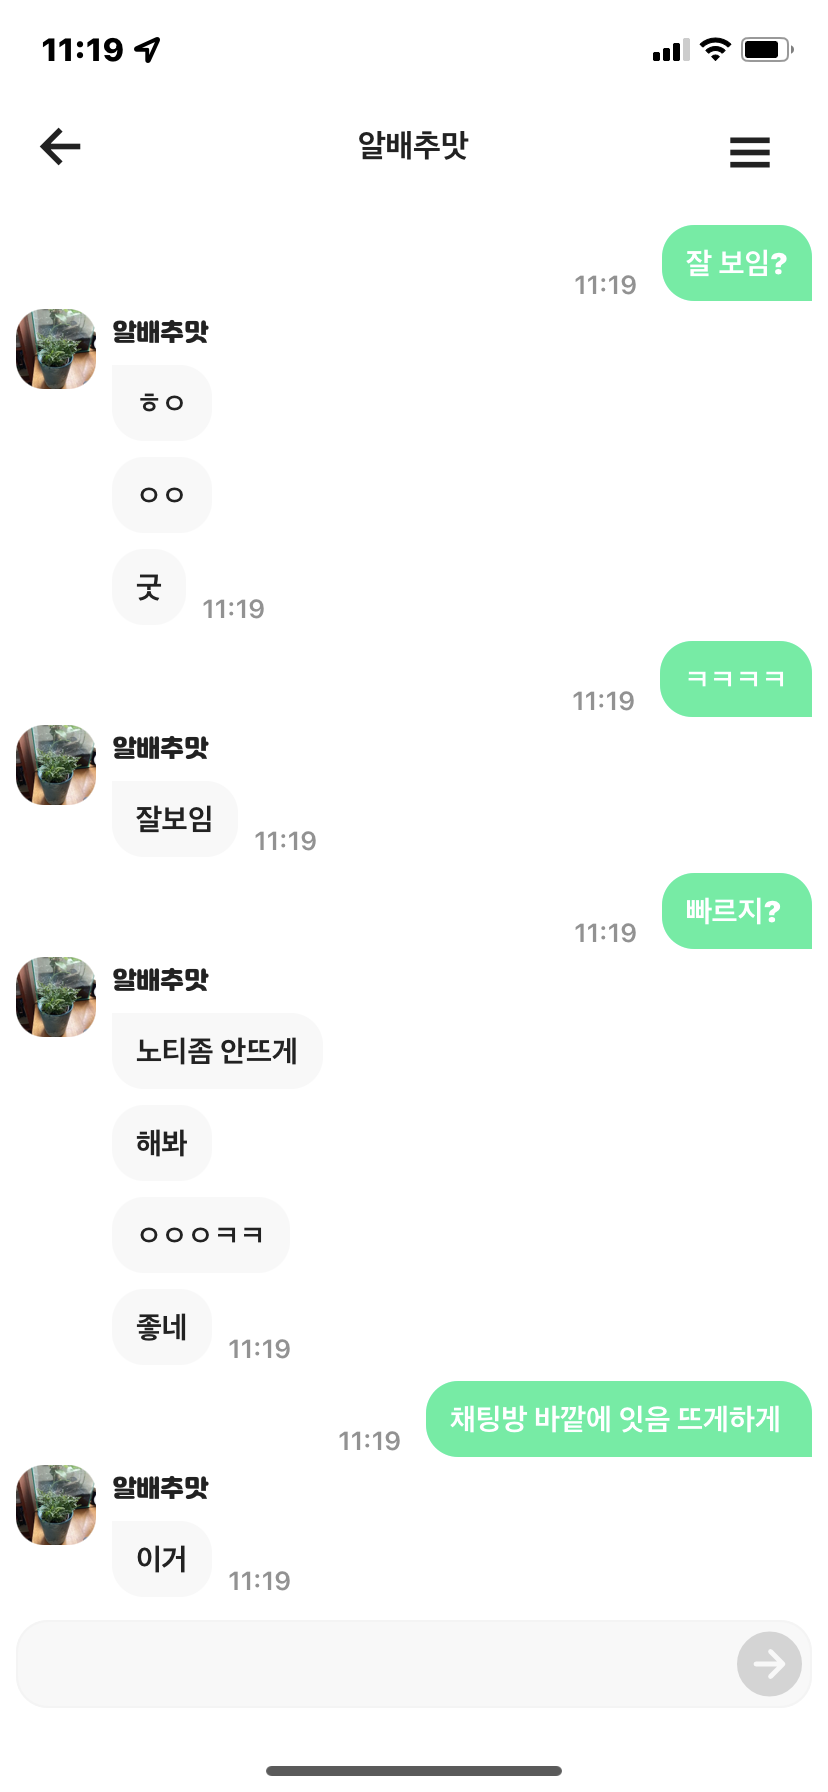
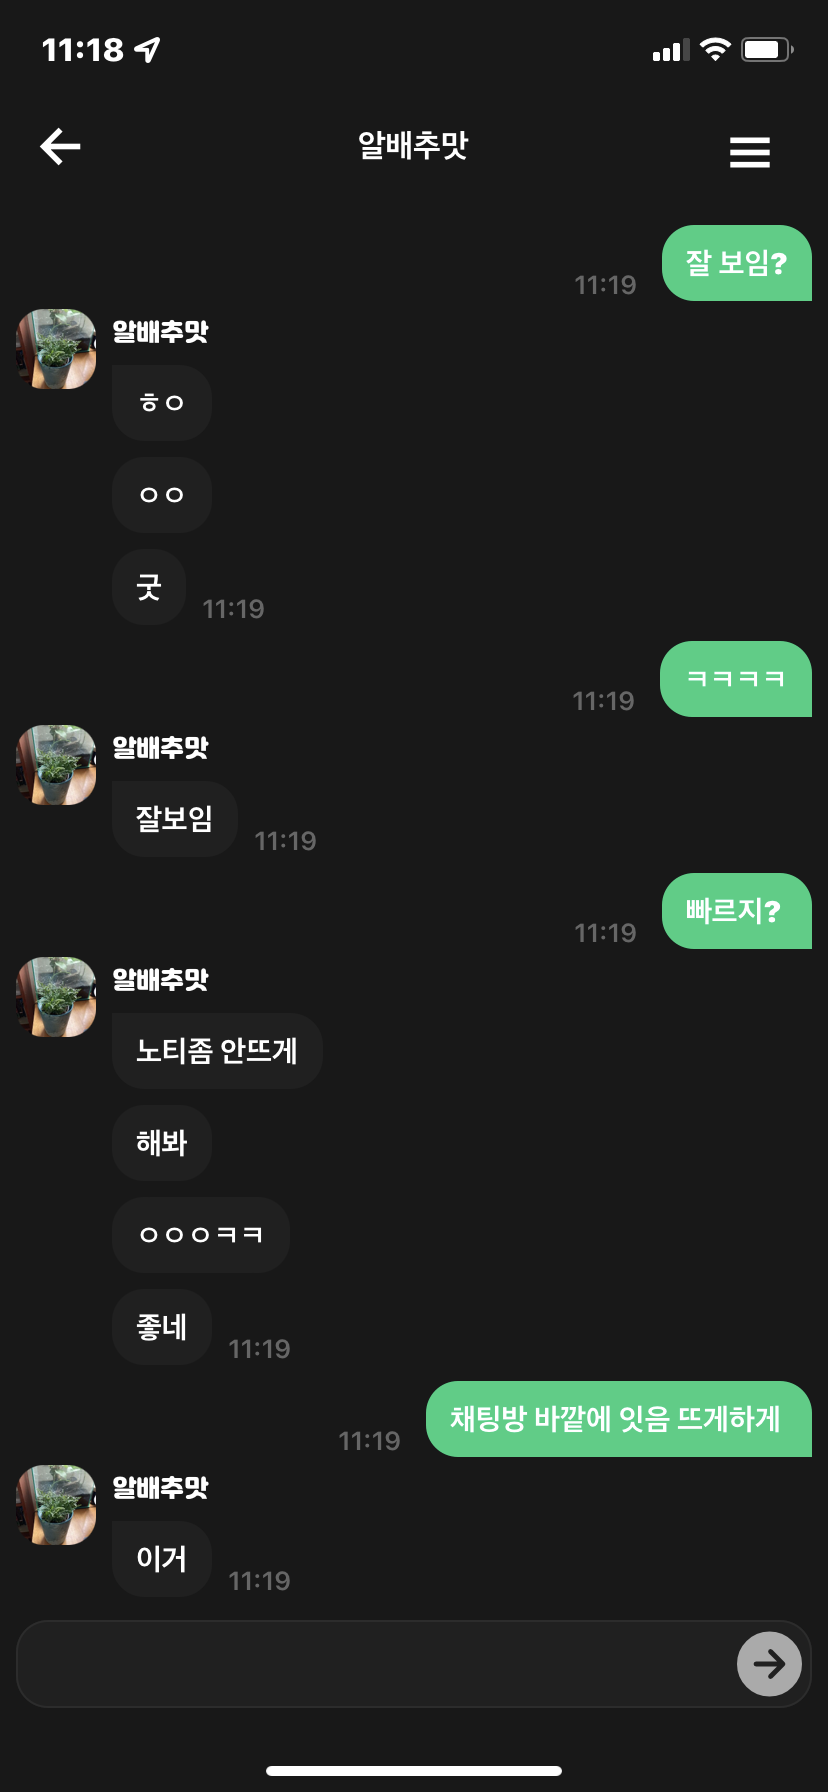

생각보다 이쁘게 잘나온다. 나중에 시간되면 사진 업로드까지 붙이고 싶긴하다.
이제 단톡방 구현 해야지...
# Note 2. Custom Event
RN 환경에서 개발을 하다가 Custom Event 를 발생시켜야 하는 상황이 생겼다.
인스타그램과 같은 앱에서 하단 탭을 여러번 탭하거나 로고를 누르는 경우 스크롤을 쭉 올려주는 구현을 하고 싶었다.
# 문제점
- 하단 탭 컴포넌트와 리스트 컴포넌트가 완전히 분리된 컴포넌트이기 때문에 소통할 수 있는 구조가 아니였다.
- Node Module events 를 사용해서 커스텀 이벤트를 발생시켜 구현하고 싶었지만 React Native 환경에서는 기본 모듈이 없다.
- 다른 라이브러리 찾아서 쓸까 고민 했지만 그냥 커스텀으로 만들어 보기로 결정했다.
- RN 코어 라이브러리를 제외하고는 다른 라이브러리 사용을 최소화하기 위한 노력이다.. ㅎㅎ
# 해결방안
일단 기본적인 addEventListener 와 클린업을 위한 removeEventListener 만 러프하게 작성해보았다.
type Callback = (args?: unknown) => Promise<void> | void;

class EventClass {
  private static Listeners = new Map<string, Callback>();

  static addEventListener(name: string, callback: Callback) {
    const [isNameString, isCallbackFn, isExists] = [
      typeof name === 'string',
      typeof callback === 'function',
      EventClass.Listeners.has(name),
    ];

    if (!isNameString || !isCallbackFn || isExists) return;

    EventClass.Listeners.set(name, callback);
  }

  static removeEventListener(name: string) {
    if (typeof name !== 'string') return;
    EventClass.Listeners.delete(name);
  }

  static emit(name: string, args?: unknown) {
    const callback = EventClass.Listeners.get(name);

    if (typeof callback === 'function') {
      callback(args);
    }
  }
}

export default EventClass;
2
3
4
5
6
7
8
9
10
11
12
13
14
15
16
17
18
19
20
21
22
23
24
25
26
27
28
29
30
31
32
이제 BottomTabs 에서 같은 탭을 두번 클릭하게 되는 경우 이벤트를 발생 시킨다.
import { Event } from '@all-live';

const BottomTabBar: React.FC<BottomTabBarProps> = ({ navigation, state }) => {
  const onTabPressHandler = useCallback(
    (currIdx: number, idx: number) => () => {
      if (currIdx !== idx) {
        navigation.navigate(state.routes[idx].name);
        return;
      }
      if (currIdx === BOTTOM_TABS.HOME_TAB_SCREEN) {
        // 두번 연속으로 같은 탭을 탭하는 경우 이벤트 발생
        Event.emit('scrollFlatListToTop');
      }
    },
    [],
  );
  // 생략
2
3
4
5
6
7
8
9
10
11
12
13
14
15
16
17
리스트 컴포넌트에선 이벤트 리스너를 등록해준다.
import { Event } from '@all-live';

const AllTalentList: FC<AllTalentListProps> = memo(({ navigation }) => {
  const flatListRef = useRef<FlatList>(null);

  const onScrollToTopHandler = useCallback(() => {
    flatListRef.current?.scrollToOffset({ animated: true, offset: 0 });
  }, []);

  useEffect(() => {
    // 이벤트 리스너 등록
    Event.addEventListener('scrollFlatListToTop', onScrollToTopHandler);
    return () => {
      // 클린업
      Event.removeEventListener('scrollFlatListToTop');
    };
  }, []);

  // 생략
2
3
4
5
6
7
8
9
10
11
12
13
14
15
16
17
18
19
동작이 잘되는걸 확인하고 나서 타입 적용을 시작했다.
목표는 아래와 같다.
이벤트 이름 강제 시
이벤트 이름에 따라 콜백에 인자가 있는 경우 인자 타입 정의
코드가 그렇게 길지 않아서 전체코드를 올리자면
// 여기 인터페이스를 기반으로 인자 타입을 결정 해준다.
interface CustomEvents {
  // 이벤트 이름: 인자 타입
  scrollFlatListToTop: undefined;
}

type Callback<T> = (args: T | Partial<T>) => Promise<void> | void;
type EventNames = Extract<keyof CustomEvents, string>;

class EventClass {
  private static Listeners = new Map();

  static addEventListener<EventName extends keyof CustomEvents = EventNames>(
    name: EventName,
    callback: Callback<CustomEvents[EventName]>,
  ) {
    const [isNameString, isCallbackFn, isExists] = [
      typeof name === 'string',
      typeof callback === 'function',
      EventClass.Listeners.has(name),
    ];

    if (!isNameString || !isCallbackFn || isExists) return;

    EventClass.Listeners.set(name, callback);
  }

  static removeEventListener(name: EventNames) {
    if (typeof name !== 'string') return false;
    return EventClass.Listeners.delete(name);
  }

  static removeAllEventListeners() {
    EventClass.Listeners.clear();
  }

  static emit<EventName extends keyof CustomEvents = EventNames>(name: EventName, args?: CustomEvents[EventName]) {
    const callback = EventClass.Listeners.get(name);

    if (typeof callback === 'function') {
      callback(args);
    }
  }
}

export default EventClass;
2
3
4
5
6
7
8
9
10
11
12
13
14
15
16
17
18
19
20
21
22
23
24
25
26
27
28
29
30
31
32
33
34
35
36
37
38
39
40
41
42
43
44
45
46
와 같이 해주었고 타입 적용이 잘 되고 있는지 확인 해보았다.
타입이 잘 적용 되는지 테스트 하기 위해 인터페이스를 아래와 같이 변경
interface CustomEvents {
  scrollFlatListToTop: { myParam: number };
}
2
3
emit 하는 부분

callback 등록하는 부분
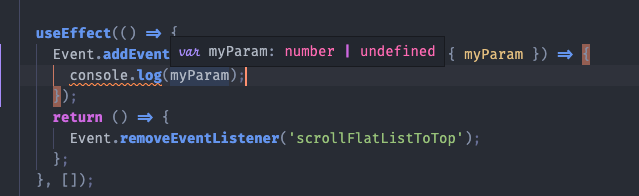
잘된다 ㅎㅎ
# 결과
거의 뇌피셜로 구현해서 이렇게 하는게 맞는지 모르겠는데 기능은 대충 흉내낸거 같다.

# Note 3. Toast 만들기
Toast Modal 을 커스텀하게 제작해서 사용하고 있는데 문제점이 있었다.
# 문제점 🚨
Toast Modal 이 떠있는 동안 화면을 제어하지 못한다.
문제가 발생한 이유는 navigation 을 이용해서 transparent modal 로 화면 이동을 해서 하는 방식으로 구현을 했는데 아래 요구사항을 쉽게 만족하기 위해서였다.
# 요구사항 💭
✅ Toast Modal 이 생겼다가 일정시간 이후 자동으로 사라져야함
✅ 애니매이션 (fade in, out) 효과가 있어야함
✅ 화면 뒤에 컨텐츠가 보여야 함
❌ 화면 제어가 가능해야함 → 문제 발생😱
4번 문제를 일단 냅두고 1차 배포를 했는데 이제 해결하기 위한 방법을 생각해보았다.
# 해결방안 🤔
기존 방식은 아래와 같이 navigation 을 통한 화면 이동이였다. 해당 방식으로는 애니메이션을 따로 코딩하지 않고 구현할 수 있어서 하였는데 4번 문제를 해결 할 수 없었다.
navigation.navigate('TOAST_MODAL', { body: TOAST_MESSAGES.TALENT.LIKED });
제일 처음 떠올린 해결방안은 navigation 을 통한 화면 이동이 아닌 작은 컴포넌트를 띄워주는 방식으로 해결 하고자 하였다.
부모 컴포넌트가 자식 컴포넌트를 제어해야하기 때문에 useImperativeHandle 을 활용 하였다.
전체 코드는 아래와 같다.
type Timer = ReturnType<typeof setTimeout>;

const TOAST_TIMEOUT_IN_MS = 1200;

const Toast = forwardRef<ToastRef>((_, ref) => {
  const timer = useRef<Timer | null>(null);
  const isAnimating = useRef<boolean>(false);
  const { bottomInset } = useSafeArea();
  const animation = useRef(new Animated.Value(0)).current;

  const [body, setBody] = useState<string | null>(null);
  const [margin, setMargin] = useState<number>(0);

  const doneAnimatingCallback = useCallback(() => {
    isAnimating.current = false;
    setBody(null);
  }, []);

  const timeOutHandler = useCallback(() => {
    Animated.timing(animation, { toValue: 0, duration: 200, useNativeDriver: true }).start(
      doneAnimatingCallback
    );
  }, []);

  const onShowHandler = useCallback((toastProps: ToastProps) => {
    const { timeOutInMs = TOAST_TIMEOUT_IN_MS, body: toastBody } = toastProps;
    // 이미 다른 toast 가 animating 중인 경우 다른 toast 는 억제
    // 1. 큐에 넣어서 하나씩 처리할까 생각했지만 애매해서 중단
    // 2. 기존 toast 를 취소하고 새로운 toast 를 띄워주는 방식도 가능할듯
    if (isAnimating.current) return;
    isAnimating.current = true;
    setBody(toastBody);
    Animated.timing(animation, { toValue: 1, duration: 400, useNativeDriver: true }).start();
    timer.current = setTimeout(timeOutHandler, timeOutInMs);
  }, []);

  const imperativeHandler = useCallback(
    () => ({
      show: onShowHandler
    }),
    []
  );

  const onBodyLayoutHandler = useCallback((event: LayoutChangeEvent) => {
    // container left margin 을 계산하기 위함
    const containerWidth = event.nativeEvent.layout.width;
    if (typeof containerWidth !== 'number') return;
    setMargin(Math.floor((DIMENSIONS.WIDTH - containerWidth) / 2));
  }, []);

  useImperativeHandle(ref, imperativeHandler, []);

  return (
    <>
      {body && (
        <ToastStyle.Container
          as={Animated.View}
          leftMargin={margin}
          bottomInset={bottomInset}
          style={{ opacity: animation }}
        >
          <ToastStyle.BodyView onLayout={onBodyLayoutHandler}>
            <GlobalText.TextSmall color="whiteColor">{body}</GlobalText.TextSmall>
          </ToastStyle.BodyView>
        </ToastStyle.Container>
      )}
    </>
  );
});

const ToastStyle = {
  Container: Styled.View<SafeAreaInsets & { leftMargin: number }>`
    position: absolute;
    bottom: ${({ bottomInset = 0, theme }) => theme.bottomTabBarHeight + bottomInset + 16}px;
    margin-left: ${({ leftMargin }) => leftMargin}px;
  `,
  BodyView: Styled.View`
    border-radius: 8px;
    background-color: #000000aa;
    padding: 16px;
  `
};
2
3
4
5
6
7
8
9
10
11
12
13
14
15
16
17
18
19
20
21
22
23
24
25
26
27
28
29
30
31
32
33
34
35
36
37
38
39
40
41
42
43
44
45
46
47
48
49
50
51
52
53
54
55
56
57
58
59
60
61
62
63
64
65
66
67
68
69
70
71
72
73
74
75
76
77
78
79
80
81
82
각각 요구사항에 대한 구현은 아래와 같이 진행함!
Toast Modal 이 생겼다가 일정시간 이후 자동으로 사라져야함
imperativeHandler를 통해 부모 컴포넌트에서 onShowHandler 를 호출할 수 있도록 세팅,setBody 를 통해 뷰가 나타나도록 하고 Animated API 를 통해 opacity 애니메이션으로 fade in 효과 구현
animation 은 useNativeDriver 를 통해 네이티브로 넘김
setTimeOut 을 통해 fade out animation 호출 후 콜백으로 다음 애니메이션 가능하도록 isAnimating 값 업데이트
애니매이션 (fade in, out) 효과가 있어야함
위에 설명한 Animated API 로 해결!
화면 뒤에 컨텐츠가 보여야 함
const CategoryTabScreen: React.FC<CategoryTabScreenProps> = ({ navigation }) => {
  // toast 제어하기 위한 ref
  const toastRef = useRef < ToastRef > null;

  const likePressHandler = useCallback(
    (subCategoryLikeInfo: SubCategoryLikeInfo) => async () => {
      try {
        // 생략
        // show handler 호출
        toastRef.current?.show({
          body: getCategoryLikeToastBody(subCategoryLikeInfo, result)
        });
      } catch (error) {
        // 생략
      }
    },
    []
  );

  return (
    <SafeAreaView>
      <OtherComponents likePressHandler={likePressHandler} />
      {/* SafeAreaView 에서 가장 앞쪽에 노출 되도록 */}
      <Toast ref={toastRef} />
    </SafeAreaView>
  );
};
1
2
3
4
5
6
7
8
9
10
11
12
13
14
15
16
17
18
19
20
21
22
23
24
25
26
27화면 제어가 가능해야함 👉 핵심 이슈!
Container 컴포넌트를 width: 100% 로 Text 컴포넌트를 margin: 0 auto 와 같이 해줄 수 있지만 아래 그림과 같은 영역 터치가 불가능 해진다.

따라서 container width 는 토스트 가로 길이에 딱 맞도록 하고 margin-left 속성을 동적으로 조절 해주는 방향으로 진행했다. 토스트를 제외한 모든 영역 터치가 가능하게 하도록 하기 위함이다.
onBodyLayoutHandler 를 통해 body 에 따른 뷰의 가로 길이를 계산해서 container margin-left 값을 동적으로 조절.

잘 적용된 모습. 끝~!
개발자 입장에선 많은 변화가 있었지만 사용자들은 해당 이슈가 있는지도 모를때가 많다..ㅎㅎ
그래도 나만 만족하면 됨
← Guide 알고리즘 정리 노트 →